Getting Started with Sphinx / Autodoc: Part 1
In this article, we’ll be going through the (very) basics of generating documentation from docstrings in your Python code. It is a bit of a grind, but after you do it once, it will be easy to repeat the process in every new project.
For our purposes, we will assume that you (1) believe in the value of documenting your code; (2) wish to generate docs from your docstrings and (3), have chosen to use Sphinx to accomplish the work.
Finally, it is assumed that you have already setup a distinct virtual environment for your application. For those interested, I really like the pyenv environment manager. It even has a handy installer.
Step 1: Installing Sphinx
You’ll need to install sphinx via pip. At a minimum you will need version 1.3, but unless you have good reason, you should install the most recent version.
$ pip install sphinx
Step 2: Setup your Project with Quickstart
When you install the sphinx package a number of command line utilities are setup as well.
One of those, sphinx-quickstart will quickly generate a basic configuration file and directory structure for your documentation.
Run this command at the base directory of your project (i.e. the Git repo root). It will ask you a number of questions that will determine it’s actions. You can generally accept the default values, but here are some suggestions of when to deviate from the default:
Root path for the documentation: ./docsautodoc: automatically insert docstrings from modules (y/n): ycoverage: checks for documentation coverage (y/n) [n]: y
After the program has run, you’ll notice that a new ./docs folder exists in your project directory. In addition, there are three new files in that folder: conf.py, index.rst, andMakefile.
Step 3: Adjusting the conf.py File
The default conf.py file generated by the quickstart utility is about 170 lines long, so I won’t include the whole thing here. There are however, a couple of items that we need to update before continuing.
Tell Sphinx the Location of your Python Package
The first thing that we need to do is indicate where the Python package that contains your program code is in relation to the conf.py file. If your directory structure looks like this:

You will need to indicate in the conf.py file that Sphinx must go “up” one directory level to find the Python package.
The place to put this is at the end of the first section of the configuration file. Just before the General Configuration settings, you’ll see this:
# import os
# import sys
# sys.path.insert(0, os.path.abspath('.'))
If it wasn’t commented out, it would indicate that your package is in the same directory as the conf.py file. You’ll need to change it to this:
import os
import sys
sys.path.insert(0, os.path.abspath('..'))
Add “Napoleon” to the list of Sphinx Extensions to Use
Out of the box, Sphinx only understands docstrings written in traditional reStructuredText. If you’ve had the, ahem, privilege of working with such docstrings, you’ll know that they are a pain to write and not at all human friendly to read when looking at them directly in the source code.
The Napoleon extension enables Sphinx to understand docstrings written in two other popular formats: NumPy and Google.
All we have to do is add sphinx.ext.napoleon to the extensions list. When you are done, it should look like this:
extensions = ['sphinx.ext.autodoc', 'sphinx.ext.coverage', 'sphinx.ext.napoleon']Step 4: Update index.rst
At this point, we could actually run the build process to generate our documentation. But it would be pretty disappointing. Here’s is what we’d get:
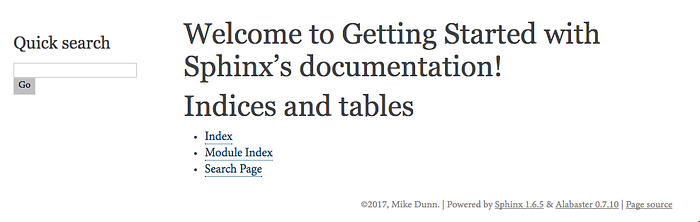
As much as I would like for Sphinx to go and find our docstrings for us and arrange them nicely without any further configuration, it isn’t quite that magical.
To move forward, we will have to do some minor modifications to our index.rst file, which currently looks like this:
.. Getting Started with Sphinx documentation master file, created by
   sphinx-quickstart on Mon Nov 13 11:41:03 2017.
   You can adapt this file completely to your liking, but it should at least
   contain the root `toctree` directive.Welcome to Getting Started with Sphinx's documentation!
=======================================================.. toctree::
   :maxdepth: 2
   :caption: Contents:Indices and tables
==================* :ref:`genindex`
* :ref:`modindex`
* :ref:`search`
Let’s start by getting rid of the comment at the top which is just noise:
Welcome to Getting Started with Sphinx's documentation!
=======================================================.. toctree::
   :maxdepth: 2
   :caption: Contents:Indices and tables
==================* :ref:`genindex`
* :ref:`modindex`
* :ref:`search`
Now, while there are a number of things that we could do here, we are going to limit ourselves to the bare minimum to keep this post to a somewhat reasonable length.
Do you see that .. toctree:: line? That is what Sphinx calls a directive. We need to add autodoc directives to our index.rst file so that Sphinx knows what code objects we wish to use the autodoc extension on.
I’ll go ahead and add one indicating to Sphinx that I want it to document the public members of my main.py module inside the my_project package:
Welcome to Getting Started with Sphinx's documentation!
=======================================================.. automodule:: my_project.main
    :members:.. toctree::
   :maxdepth: 2
   :caption: Contents:Indices and tables
==================* :ref:`genindex`
* :ref:`modindex`
* :ref:`search`
Step 5: Write Your Docstrings
We will not cover the how to write docstrings in Numpy or Google style in this post.
However, here is the code from main.py which contains a couple of simple NumPy style docstrings that will be picked up by our autodoc directive:
Step 6: Generate your Docs!
Now it’s time to reap the rewards of your labor. Make sure you are in the ./docs directory and execute the following: make html
If you’ve been following along thus far, you should see something like this:
Running Sphinx v1.6.5
loading pickled environment... done
building [mo]: targets for 0 po files that are out of date
building [html]: targets for 1 source files that are out of date
updating environment: 0 added, 1 changed, 0 removed
reading sources... [100%] index
looking for now-outdated files... none found
pickling environment... done
checking consistency... done
preparing documents... done
writing output... [100%] index
generating indices... genindex py-modindex
writing additional pages... search
copying static files... done
copying extra files... done
dumping search index in English (code: en) ... done
dumping object inventory... done
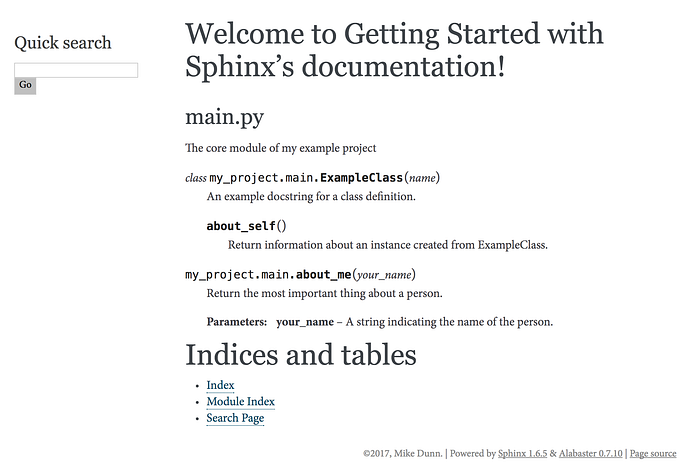
build succeeded.As long as you see that glorious build succeeded message at the end, you are ready to go and behold your beautiful creation.
At the command line, execute open _build/html/index.html (or just open up that page in your browser manually) and you should see something like this:
Next Steps
We’ve just scratched the surface here and there are a lots of warts still in our simple documentation.
In the next post on this topic, we will dig deeper into the directives of the autodoc extension and achieve greater control of the content and appearance of our documentation.